Winter doesn’t just mean snowfall and shorter days, it brings real stress to your home’s structure, systems, and comfort. Cold temperatures expose weaknesses: leaking windows, neglected gutters, frozen pipes, and struggling heating systems can turn a cozy season into a costly nightmare. A thorough winter home maintenance checklist done in fall or early winter prevents emergency repairs, protects your investment, and keeps your family warm. This guide walks you through the essential seasonal checks that experienced homeowners and contractors prioritize before temperatures drop.
Table of Contents
ToggleKey Takeaways
- A winter home maintenance checklist completed in fall prevents emergency repairs and protects your investment by addressing heating loss, frozen pipes, and roof damage before temperatures drop.
- Sealing drafts around windows and doors—which account for 15-30% of heat loss—through caulking and weatherstripping is an affordable afternoon project that costs under $100 per room.
- Schedule a professional furnace inspection and maintain your heating system with regular filter changes to prevent mid-winter breakdowns and dangerous carbon monoxide leaks.
- Clean gutters, inspect roofing for damage, and ensure downspouts extend 4-6 feet from your foundation to prevent ice dams, leaks, and costly structural damage.
- Winterize outdoor systems and insulate exposed pipes in unheated areas to avoid burst copper lines, which can cost $500-1,500 to repair.
- Most winter home maintenance tasks take a weekend, cost $500-1,500 total, and prevent thousands in water damage, heating inefficiency, and emergency contractor calls.
Inspect and Seal Windows and Doors
Drafts around windows and doors account for major heating loss, sometimes 15-30% of your home’s warmth escapes through gaps. Start by running your hand around the interior perimeter of each window and door frame on a breezy day: you’ll feel air leaks immediately.
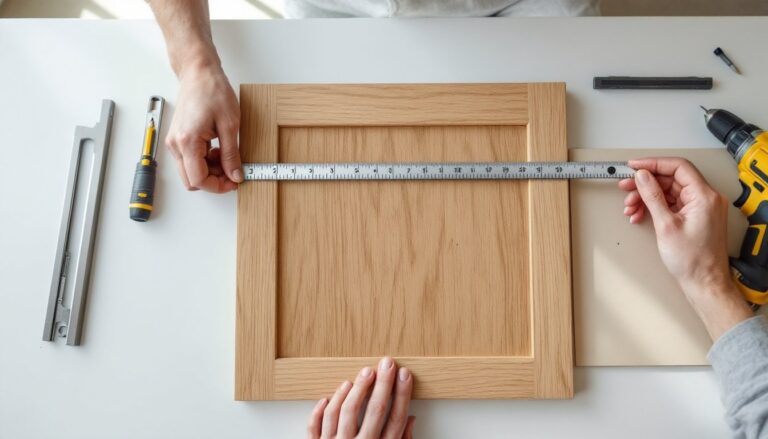
Check the caulk and weatherstripping. Caulk shrinks, cracks, and hardens over years: weatherstripping flattens and loses grip. If either is visibly damaged or missing, replacement takes an afternoon and costs under $100 per room. Remove old caulk with a caulking gun and putty knife, clean the frame thoroughly, and apply fresh 100% silicone or acrylic-latex caulk in one continuous bead. For weatherstripping, measure your frame carefully, doorways need different profiles than windows, and press self-adhesive foam or rubber strips firmly into place.
Test your locks and hinges too. Frozen locks and sagging doors trap cold air. Lubricate locks with graphite powder (not WD-40, which attracts dirt) and tighten hinge screws. If a door sags, shims placed under the lower hinge can realign it: this usually requires a second set of hands.
Glass itself conducts heat. Single-pane windows lose far more warmth than double- or triple-pane units, but replacing windows is expensive. In the short term, thermal plastic film kits applied inside cut drafts significantly and cost $10-20 per window. They look frosty but are removable come spring.
Clean and Test Your Heating System
Your furnace or boiler is the hardest-working system in winter, it deserves respect and <a href="https://todayshomeowner.com/lawn-garden/guides/fall-maintenance-checklist/” target=”_blank” rel=”noopener nofollow”>maintenance. A neglected system risks breakdown mid-January when repair calls cost triple and technicians are booked solid.
Start with the air filter. Swap it every 1-3 months depending on household dust and pets: a clogged filter makes your system work harder and less efficiently. Measure your current filter (common sizes are 14×25×1 or 20×25×4 inches) and stock up on replacements before winter hits. This five-minute job saves money and extends equipment life.
Schedule a professional furnace inspection and cleaning. Licensed HVAC technicians check ignition, thermostat accuracy, heat exchanger integrity, and ductwork sealing, catches you can’t spot yourself. Cost typically runs $150-300, but it prevents a $5,000+ emergency replacement or dangerous carbon monoxide leaks. If your system is over 15 years old, get it checked even if it seems fine.
For boiler systems, the stakes are similar. Home Boiler Maintenance: Essential covers seasonal pressurization, bleed valve checks, and when to call a pro. Boilers require more precision: DIY mistakes can mean no heat or safety hazards.
Test your thermostat in both heating and cooling modes. If it’s older than 10 years or reads inconsistently, a programmable or smart replacement ($100-300) pays for itself in reduced energy use. Set it to 68°F during the day and 62°F at night: each degree lower saves about 3% on heating costs.
Protect Your Roof and Gutters
Your roof and gutters are your home’s rain shield and snowmelt highway. Neglect here leads to ice dams, leaks, rot, and thousands in structural damage.
Start with a gutter cleaning. Climb a sturdy ladder (not a step ladder, use an extension ladder with a stabilizer) and scoop leaves, twigs, and debris by hand into a bucket. Wear heavy gloves and safety glasses: standing water can hide sharp objects. Work in sections, and rinse gutters with a hose to ensure downspouts flow freely. Check that downspouts extend 4-6 feet from your foundation: short or missing extensions let water pool near your home, compromising foundations and basements.
Look for gutter damage: sagging sections, rust holes, or separation from fascia boards. Sagging gutters often need new hangers or re-pitched sections, this is worth hiring out if you’re uncomfortable on a ladder. Small rust holes can be patched with roofing cement: larger damage usually means section replacement.
Walk your roof perimeter from the ground with binoculars. Look for missing or curled shingles, exposed nails, and visible wear. Shingles usually last 15-25 years depending on material and exposure. Missing a few? You can replace them yourself if comfortable on a roof (wear a harness and have a spotter). Shingles come in bundles: a single replacement is quick once old nails are removed and new ones are driven in at the correct angle. If more than 10-15% of your roof looks compromised, call a roofer, DIY patching won’t save a failing roof.
Check for flashing (the metal seals around chimneys, vents, and valleys). Gaps or rust mean water intrusion: this requires professional remediation.
Drain and Winterize Outdoor Systems
Irrigation systems, outdoor faucets, and air conditioners left full of water will burst when temperatures drop. A burst copper line costs $500-1,500 to repair: winterizing takes an afternoon.
Outdoor faucets: Shut off the interior shut-off valve (usually near your water main or in a basement) and open the exterior faucet to drain residual water. Detach hoses, coil them, and store them inside. If your faucets lack shut-off valves, install frost-proof hose bibs (about $20 each): these have an internal valve that drains automatically when closed, a game-changer for freeze prevention.
Irrigation systems: If you have an in-ground sprinkler system, blow it out with compressed air before the first freeze. This requires renting an air compressor ($50-80/day) and careful technique, you want to eject water without damaging pipes. Alternatively, hire a pro ($100-200): they’ll blow out and cap everything. Drip irrigation hoses should be drained, coiled, and stored in a shed.
Air conditioning units: Turn off the breaker, cover the outdoor condenser with a weatherproof cover (plastic sheeting held with bungees works, or buy a $25 AC cover), and don’t run it during winter. Doing so wastes energy and can freeze the system.
Pool or hot tub? Drain or winterize per manufacturer specs. In cold climates, pools often stay full but are treated with antifreeze and have skimmers shut off. Hot tubs usually drain completely unless you live in a mild area. Check your manual, every system differs.
Prepare Your Plumbing for Freezing Temperatures
Frozen pipes are a nightmare: they block water supply and burst with thawing, flooding ceilings and walls. Prevention is simpler than repair.
Insulate exposed pipes in unheated areas: basements, crawl spaces, garages, and attics. Foam pipe insulation (split sleeves of closed-cell foam) wraps around pipes and costs $1-3 per foot. Slit the foam, wrap it around the pipe, and seal seams with duct tape. Pipes in exterior walls are at highest risk: insulate them first.
For at-risk faucets in garages or utility rooms, leave a slow drip running on the coldest nights. Moving water resists freezing: even a trickle every few seconds can prevent catastrophe. It costs pennies in water and saves thousands in damage.
Cabinet under-sink pipes (kitchen and bathrooms) are vulnerable because cold air enters through openings. Open cabinet doors on extremely cold nights to allow warm interior air to circulate, or close off exterior walls with temporary foam board or blankets.
If you have a crawl space or basement prone to freezing, ensure adequate heating. A single ceramic heater ($30-50) or heat tape on pipes provides insurance. Never use a propane heater indoors, carbon monoxide risk is real.
Locate your main water shut-off valve now, before you need it. It’s usually near the water meter or where the main line enters your home. Mark it clearly and practice turning it off so you can act fast if a pipe bursts.
Insulate and Weatherproof Vulnerable Areas
Weak insulation in attics, basements, and crawl spaces means your heating system works overtime. Insulate Attic: Transform Your covers adding insulation depth, vapor barriers, and ventilation. Most homes need R-38 to R-60 in attics depending on climate zone: check your local code.
Adding attic insulation yourself is manageable if you’re comfortable in tight spaces. Roll out batts or blow cellulose, keeping it away from recessed lights and vents. Don’t compress insulation (R-value depends on thickness): just lay it loosely. Wear long sleeves, gloves, a mask, and eye protection, fiberglass and cellulose irritate skin and lungs.
Basement rim joists (where the foundation meets the house framing) are thermal leaks. Seal gaps with silicone caulk or foam sealant, then cover the rim joist face with rigid foam board (2-3 inches), adhered and taped. This is a weekend project for a handy homeowner and cuts basement heating loss significantly.
Crawl spaces need vapor barriers: roll out heavy plastic sheeting (6-mil polyethylene) over the soil, overlapping seams by 12 inches and taping them. This prevents moisture from rising into floor cavities, which promotes rot and mold. Seal the perimeter where the plastic meets rim joists with caulk or tape.
For basement windows, consider removable acrylic covers ($30-60) that seal out cold and moisture while allowing some light. They’re better than boarding up windows and easier than permanent sealing if you rent.
Doors to unheated spaces (attics, garages, basements) should have weather seals. Install a rubber gasket-sealed door sweep on the bottom and weatherstripping on all sides. This stops warm air from escaping into spaces you don’t need to heat. You can find relevant advice on home exterior and interior winterizing by checking Home Exterior Maintenance: Unlock for comprehensive seasonal guidance.
Conclusion
Winter home maintenance isn’t glamorous, but it’s the difference between a warm, dry winter and emergency calls to contractors in January. Tackle this checklist in October or November, don’t wait until the first freeze hits and you’re scrambling. Most tasks take a weekend, cost $500-1,500 total, and prevent thousands in damage. Your future self will thank you when the temperature drops and everything still works.